★☆주차번호판 만들기☆★
카드용지와 코팅용지를 이용하여 주차 번호판을 만드는 방법입니다.
차에 붙여 놓으면 주차할 때 편하겠죠?^^
.jpg)
폼텍디자인 프로 7을 실행시킵니다.
IP-2000 카드용지를 선택한 후 확인버튼을 클릭합니다.
이미지삽입버튼을 클릭하여 배경이미지를 삽입합니다.
.jpg)
문자열 삽입버튼을 클릭하여 휴대폰번호를 입력합니다.
.jpg)
[파일] - [인쇄미리보기]를 클릭한 후 프린터설정에서 해상도와 용지를 설정한 후 출력합니다.
카드용지에 1개만 뽑기에는 종이가 많이 아깝죠?
여러개 만들어서 주변에 차가 있는 분들께 선물 하면 좋습니다^^

용지가 출력되고 있어요^^

용지가 출력되면 알맞은 사이즈로 잘라줍니다.

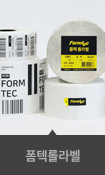
폼텍 코팅용지 입니다 ^^

종이에 맞게 코팅용지를 잘라서 붙여줍니다.

깔끔하게 코팅이 되었습니다~

코팅된 용지를 알맞게 잘라주세요
위쪽에는 펀치로 구멍을 뚫어야 하기 때문에 여유분을 좀 더 남겨 주세요

위쪽 가운데에 구멍을 펀치로 뚫어줍니다.

고리를 이용하여 압착고무와 용지를 연결합니다.
압착 고무와 고리는 문구점에서 쉽게 구입할 수 있습니다.

완성되어 차에 붙인 모습입니다^^
깔끔 하고 보기 좋죠?! 쉽고 간편하게 만들 수 있습니다.!!
주차 번호판 배경 이미지는 서식다운로드를 통해 다운 받으실 수 있습니다.


 덧글1개
덧글1개


